
Complete Guide
Everything you need to know about Auto Flow.
Create Image (Nano Banana)
- Select Create Image mode in the Control tab
- Paste one prompt per line in the Prompt List, or click Import file (.txt)
- Click Add to Queue
- Click Start — choose New Project or Current Project
- Monitor progress in the Task Progress table
- When done, switch to Gallery → Scan All to find your images
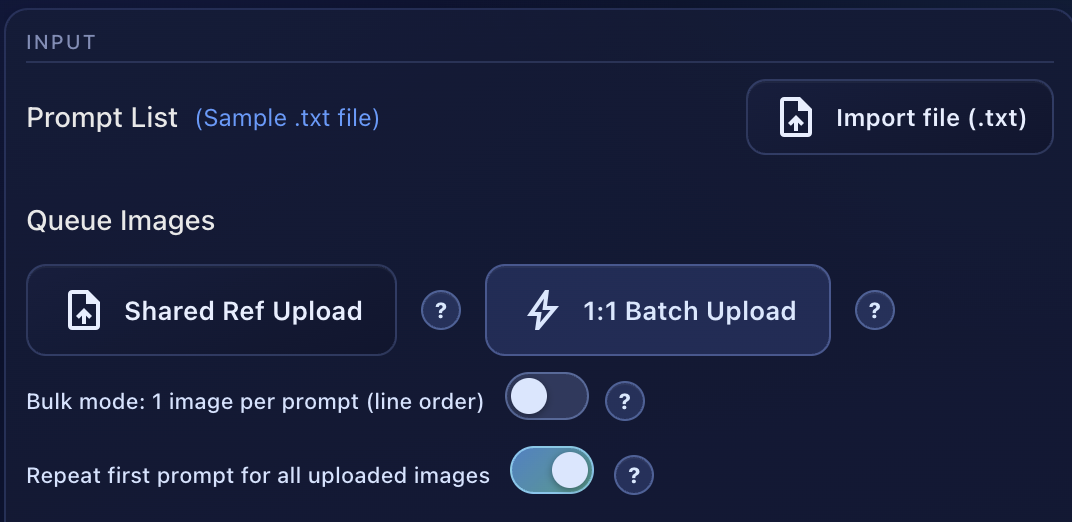 Input Section — Prompt List & Upload Options
Text-to-Video
- Select Text-to-Video mode
- Paste one prompt per line — each line is one scene with a clear camera direction
- Click Add to Queue
- Click Start and choose Create New Project or Run on This Page
- Watch Task Progress for Waiting → Generating → Done status
Best practices: keep one scene per line, put action + camera movement in the same line, use tags like [V1-S1] for stable sorting.
Frame-to-Video (Image-to-Video)
- Select Frame-to-Video mode
- Upload reference images using Shared Ref Upload or 1:1 Batch Upload
- Write video prompts in the Prompt List
- Optionally enable Map references by prompt to assign specific images to specific prompts
- Click Add to Queue → Start
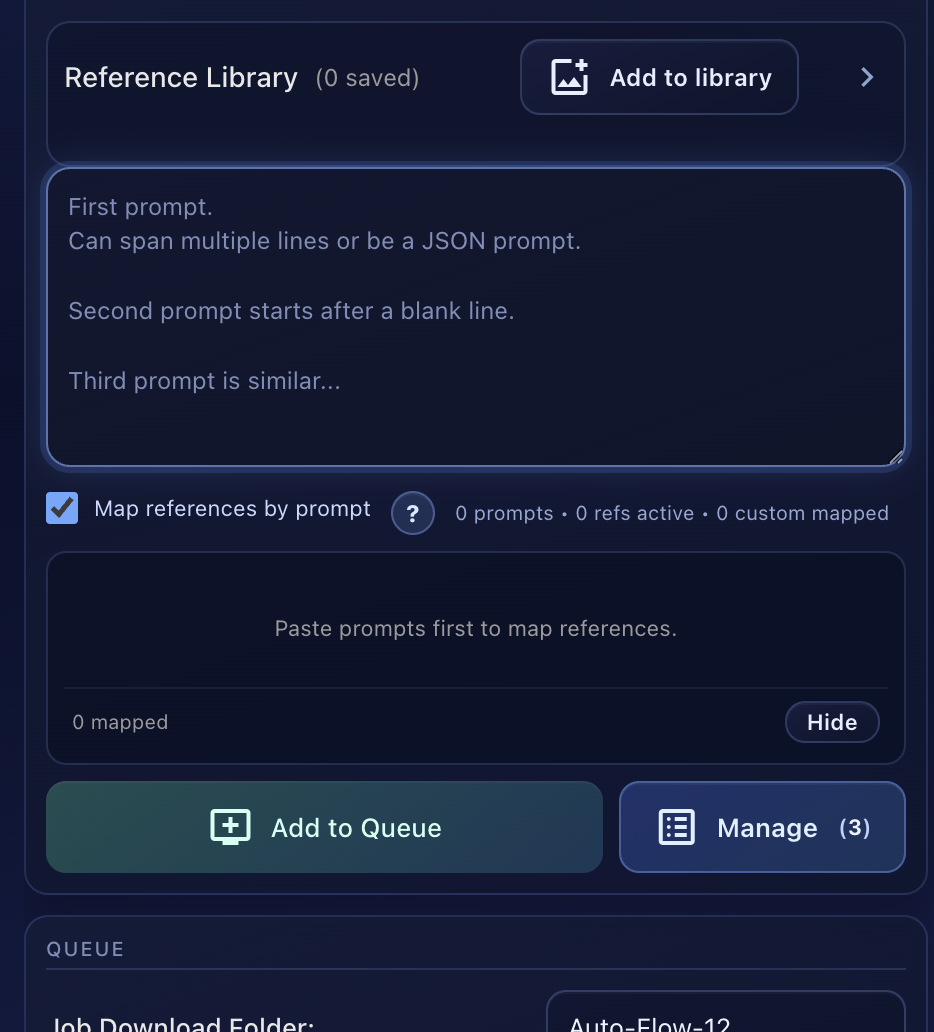 Reference Library, Prompt Mapping & Queue
Ingredients Mode
- Select Ingredients mode
- Upload product/ingredient images
- Write video prompts describing the product showcase
- Add to Queue → Start
Ingredients mode is designed for product showcase videos where you want to highlight specific visual elements.
Uploads & Reference Library
There are three ways to upload images in Auto Flow. Understanding the difference is important — only Add to Library saves images permanently.
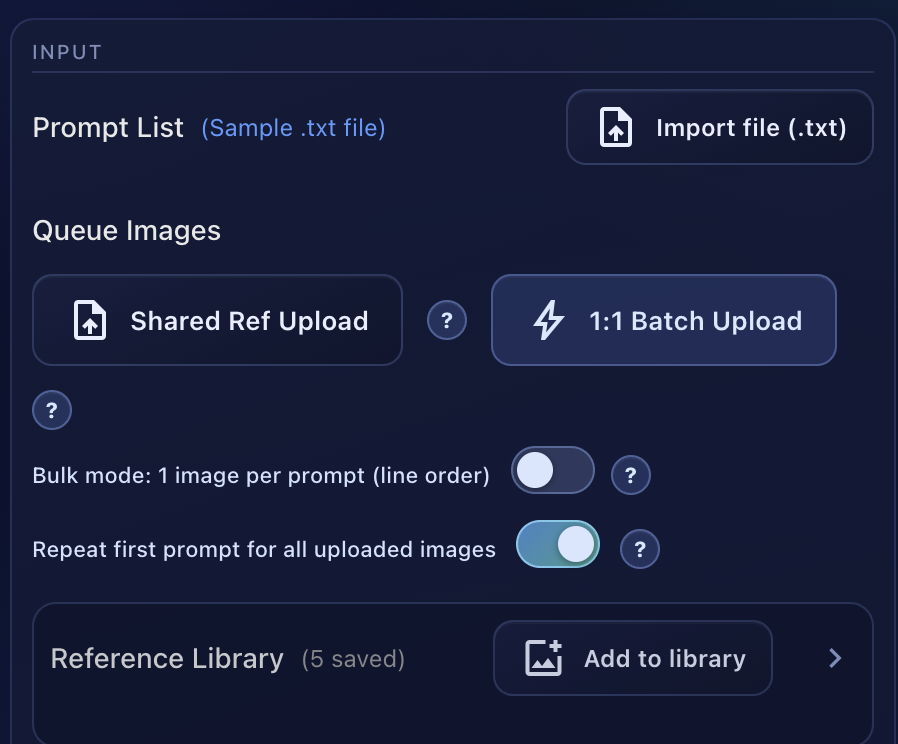 Upload Controls & Reference Library
Toggles
Quick rule: Use Shared Ref or 1:1 Batch for one-off jobs. Use Add to Library for images you want to keep and reuse across multiple jobs.
Gallery — Every Button Explained
The Gallery tab has two sub-tabs: Images and Videos. Each has its own set of controls.
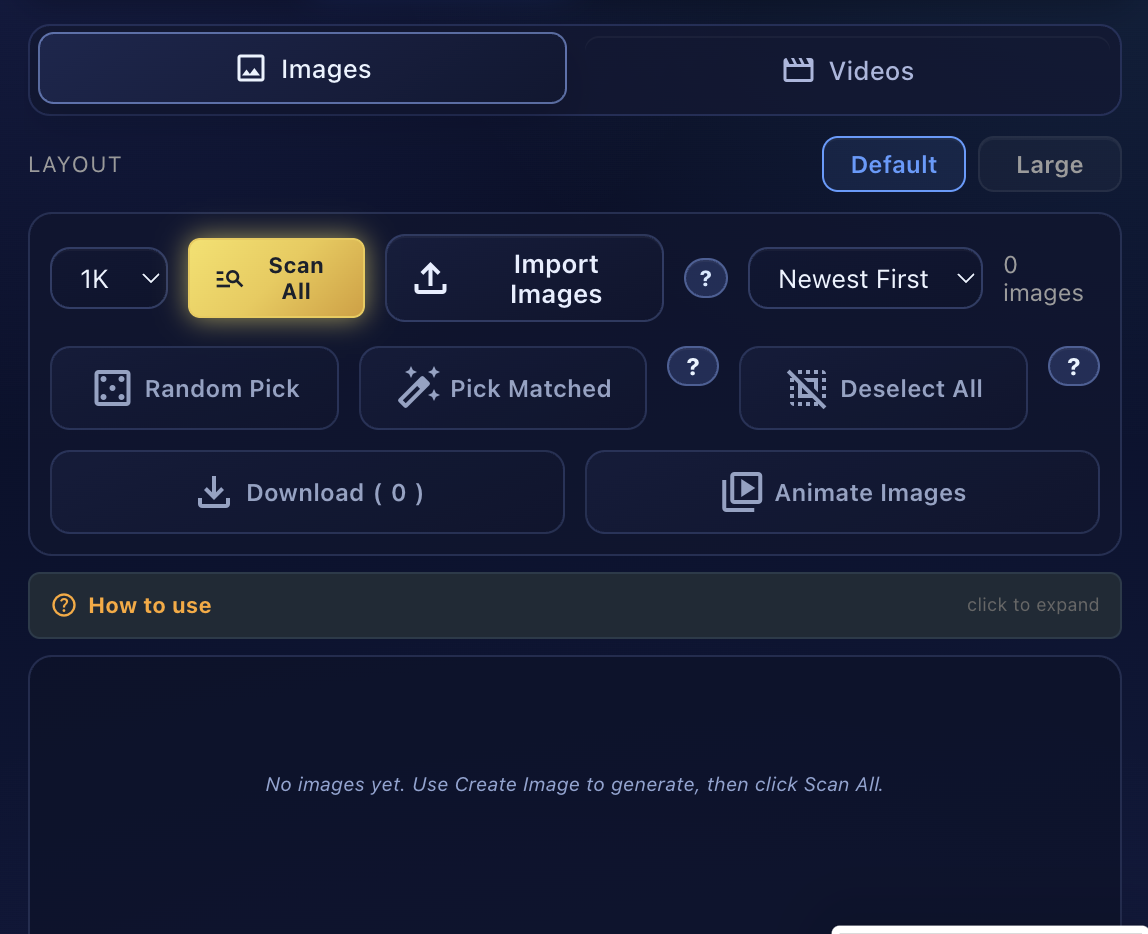 Images Gallery — All Controls
Image Gallery Buttons
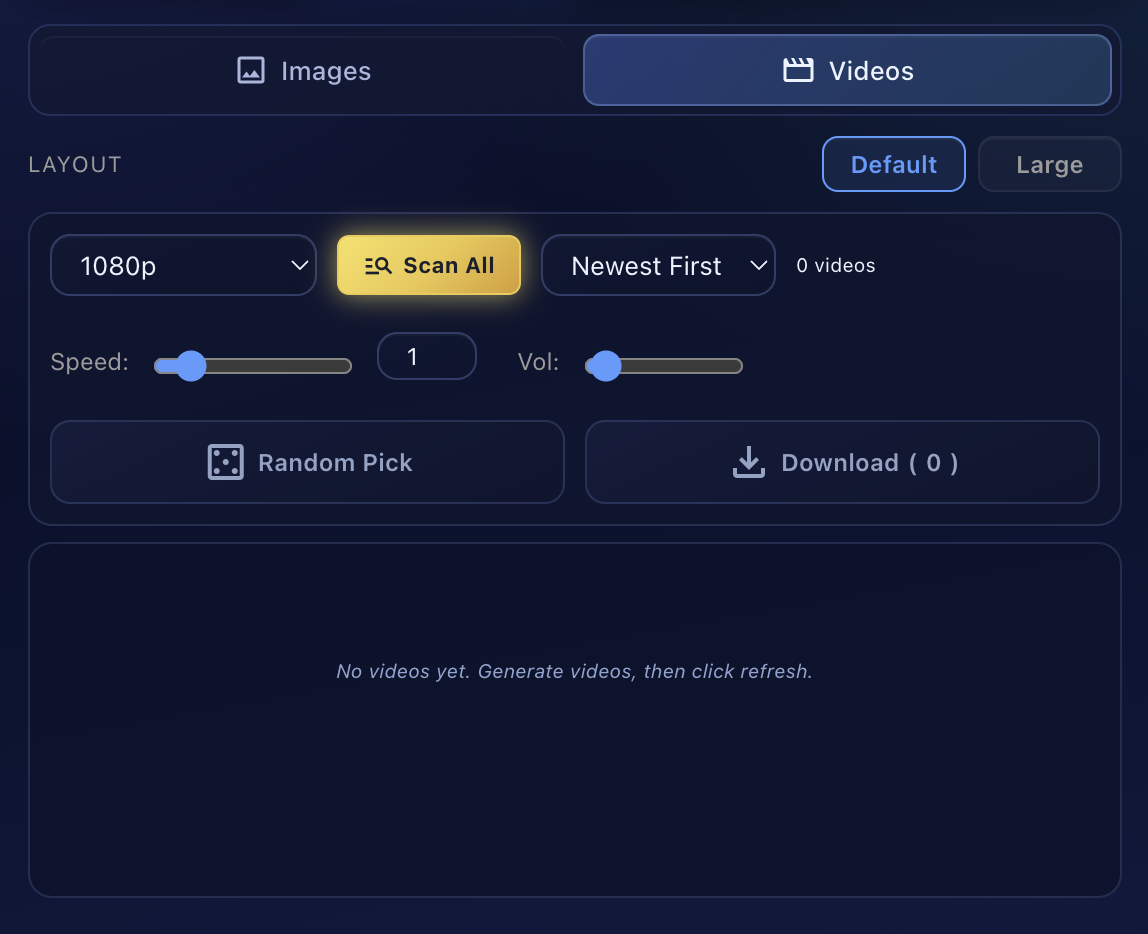 Videos Gallery — Playback & Download Controls
Video Gallery Buttons
Layout Options
Prompt Formatting Guide
How you format your prompts determines how Auto Flow processes them and how the gallery sorts your results.
Basic Format
One prompt per line. Each line = one generation task.
a cat sleeping in a sunbeam on a window sill
a hummingbird hovering near red flowers, macro shot
Tagged Format (Recommended)
Use tags like [V1-S1] to organize by video and scene. This enables proper sorting and Pick Matched functionality.
[V1-S2] close-up of the character's face as they see the experiment
[V1-S3] the experiment glows bright blue, camera pulls back
[V2-S1] a chef prepares a meal in a busy restaurant kitchen
[V2-S2] close-up of the dish being plated with garnish
V = Video number, S = Scene number. This tells Auto Flow which prompts belong together. The gallery will group them and Pick Matched will pair images with their animated videos by matching these tags.
Multi-line Prompts
Separate prompts with a blank line if a single prompt spans multiple lines:
with fog rolling through the valley below.
A close-up of a knight's armor reflecting firelight,
cinematic depth of field.
Image-to-Video Format
When using Frame-to-Video with the ||| delimiter (for Auto Flow paste):
The left side generates the image, the right side animates it. Tags must match on both sides.
Full Example (2 videos, 5 scenes each)
Here's a complete real-world example showing how to structure a multi-video project:
[V1-S2] Courier under glowing signage, wet jacket, intense expression ||| [V1-S2] Slow dolly-in while steam drifts and signs pulse.
[V1-S3] Close-up data chip in gloved hand, water droplets, amber glow ||| [V1-S3] Macro rack-focus from droplets to glowing chip core.
[V1-S4] Narrow alley with hologram ads and mist, long perspective lines ||| [V1-S4] Handheld forward move through alley with subtle parallax.
[V1-S5] Rooftop dawn reveal, storm clearing over city skyline ||| [V1-S5] Crane-up shot as sunlight breaks through clouds.
[V2-S1] Desert outpost at sunset, dust haze, long warm shadows ||| [V2-S1] Slow panorama establishing outpost and surrounding dunes.
[V2-S2] Pilot inspecting drone wing by hangar, toolkit on ground ||| [V2-S2] Medium orbit around pilot with drifting dust particles.
[V2-S3] Cracked visor close-up reflecting lightning from distant storm ||| [V2-S3] Push-in close-up with subtle head turn and light flicker.
[V2-S4] Convoy vehicles driving into dunes, headlights cutting dust ||| [V2-S4] Side tracking shot matching convoy speed with motion blur.
[V2-S5] Night camp under stars, blue emergency lamps, quiet atmosphere ||| [V2-S5] Slow pullback to wide aerial while camp lights dim.
AI Prompting Guide
Use this prompt with ChatGPT, Claude, Gemini, or any AI to generate Auto Flow-compatible prompts. Save it as a custom instruction or paste it at the start of your conversation:
Copy the prompt above and paste it into your AI of choice. Then just describe what kind of video you want and it will output ready-to-paste Auto Flow prompts.
Gallery Sorting Options
The sort dropdown controls how images and videos are ordered in the gallery:
Use A → Z sorting with tagged prompts like [V1-S1] for the cleanest gallery organization. All scenes from Video 1 will group together, then Video 2, etc.
Download Resolution (1K / 2K / 4K)
The resolution dropdown in the Gallery controls the quality of downloaded files.
Image Resolution
Video Resolution
Higher resolution = larger file size = longer download time. For batch workflows with many images, start with 1K to preview, then re-download your picks at 2K or 4K.
Queue Management
- Build up multiple jobs by clicking Add to Queue multiple times
- Click Manage to view/edit queued jobs
- Set a custom Job Download Folder name
- Enable Auto-start next job in queue to chain them
- Click Start — Auto Flow runs each job sequentially
- Monitor progress with the live Task Progress table
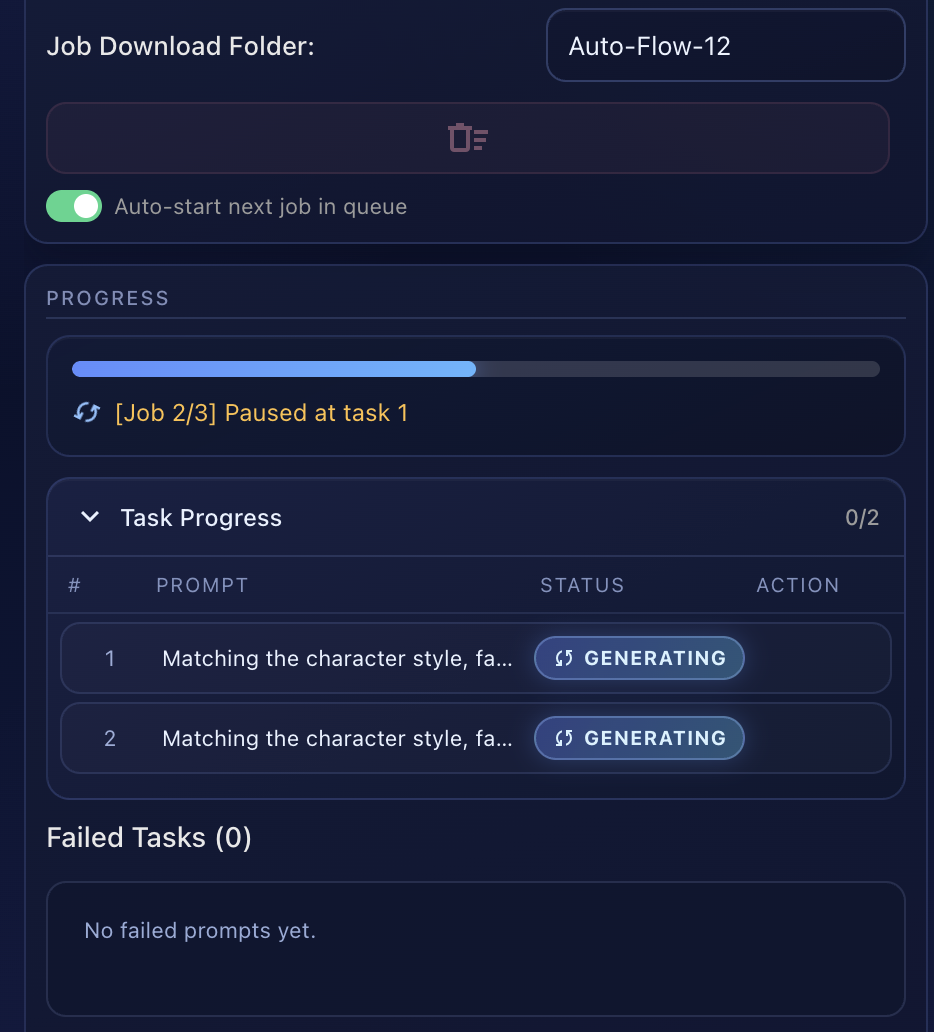 Progress Tracking & Task Status Table
Format Guide
Structural tokens that tell Auto Flow how to split prompts, map references, and keep characters consistent. Descriptions can be in any language — the tokens stay the same.
Token Cheat Sheet
Character References (@handles)
Reuse the same character across scenes by giving it a handle once, then referencing that handle wherever the character appears.
- In Character Prompts, define each reusable handle once.
- In Character Sources, upload source images or pick existing project/reference images for each handle.
- In scene prompts, reuse the exact same
@handle. - For existing Flow characters, map the handle to the existing character instead of recreating it.
Syntax
Basic: @handle character description
Advanced: @handle character description ||| voice: Flow voice name ||| info: extra notes
Using characters in scene prompts
Use the same handle wherever identity matters. For long scripts, bind the important speaker/identity mentions first rather than every descriptive mention.
Do not use spaces inside handles. Use @gary_before, not @ gary before. A display name like “Gary Before” can still map to the handle @gary_before.
Auto Flow Packet Import
Use Paste Auto Flow Packet to bring characters, video prompts, and notes in as one block. Auto Flow previews the packet before applying it into the Character Prompts and Video Prompts sections.
Prompt for your LLM
After applying a packet, use Create / Verify Native Characters so Auto Flow maps each @handle to a real Flow character before generation.
Matching Modes
Language-Agnostic Rules
Description text can be any language. Auto Flow only depends on the structural tokens:
- Keep
@handlein ASCII with no spaces. - Keep
|||as the split marker. - Keep optional field names as
voice:andinfo:. - Everything after those tokens can be natural prompt text.